Showing posts with label cookies. Show all posts

Sunday, January 2, 2011

Happy 2011

Now that all the cookies are eaten and a New Year has arrived, I
suppose I should be making a resolution to burn all that off. But
I am no good at sticking to plans like that. If I get into the
habit of things, I'm fine. But nothing makes you feel worse than
failed promises to yourself.

I know a lot of people complain about New Years resolutions
because we shouldn't be only trying to make a change at the beginning
of the year or once a year. The same as how people are only nice
and giving at Christmas instead of all year 'round.

I see it more as a chance to remember what is important in our
behavior and actions. These times are an opportunity to try again
and keep track of our habits. No, this shouldn't be restricted to
one time of year, but it does serve as a good yearly reminder of
what we've done or not done. In fact, my going vegan started as a
New Years Resolution long ago.

Than yes, I'm going to try to get into a better exercise routine, I'm
gonna try to not eat so many goodies, and try to drink more green
smoothies-- or something like that.

Instead my resolutions are a little more general. I'm not worried about
strict pounds, inches or even dress sizes. My New Years Resolution
falls into the range of 'tivities' By that I mean productivity and
creativity. This year I will strive to allot more time to enhance my
productivity and creativity. Planning ahead and indulging in artistic
pastimes is my idea for 2011.

Last year I was resolved to become more sustainable and I did pretty
well. I've restricted my purchasing to products that have less
packaging, I eat out anymore, and produce only 1 gallon of trash every
six months. I've got my cats on a biodegradable litter. I shop at the
farmers market, locally owned shops, and go for organic whenever possible.

I'm starting to sew again and rarely buy anything new. To continue
building on my resolution for last year we are going to build a
container garden in the spring and I'll start doing tons of preserving
and canning.

The Holidays went by much quicker for me than ever before.
Our Christmas got postponed, so I've been playing mental catch-up
for over a week now. I'm back to school on Monday, which means lots
of last minute shopping, ordering of books, and back to riding my
bike late at night in the cold.

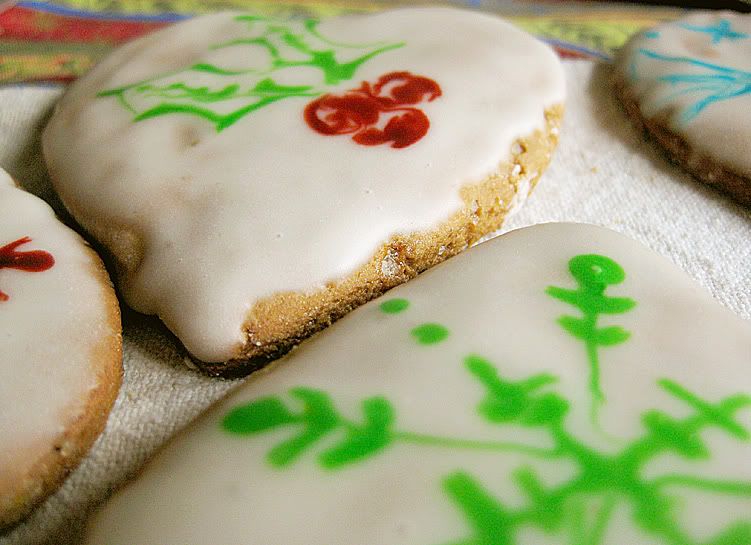
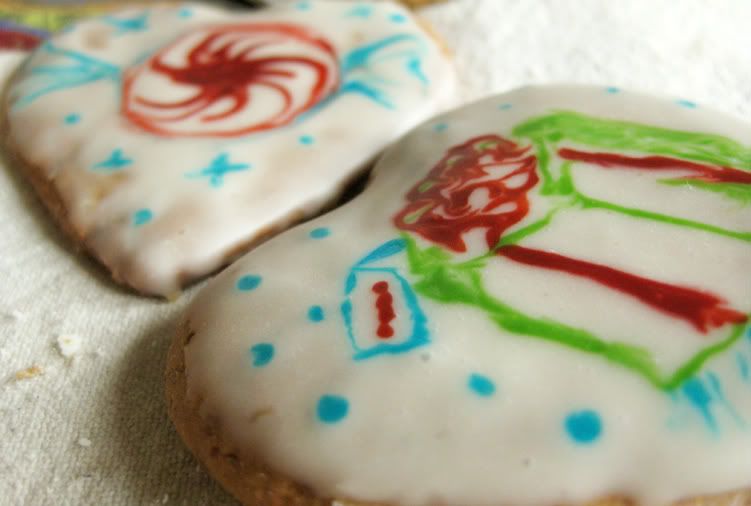
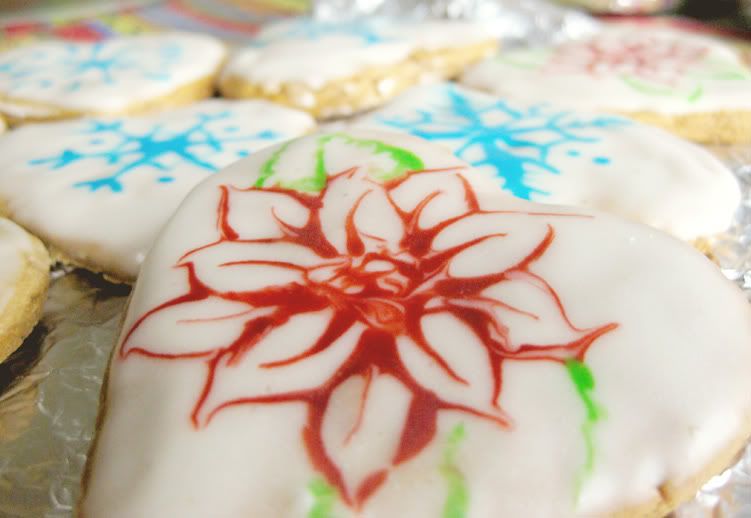
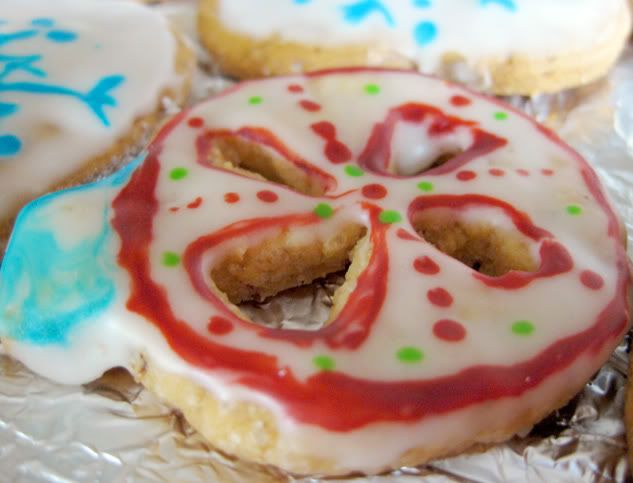
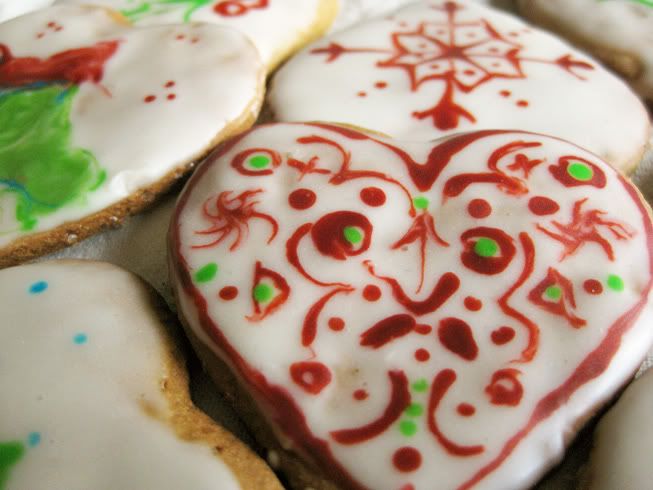
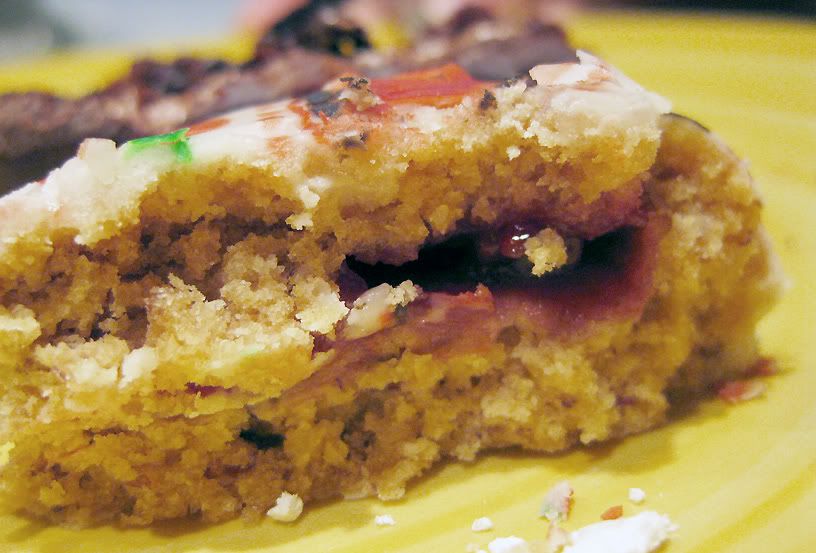
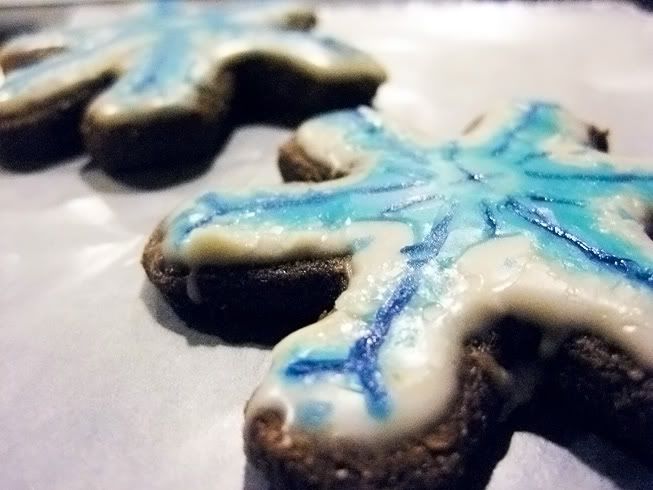
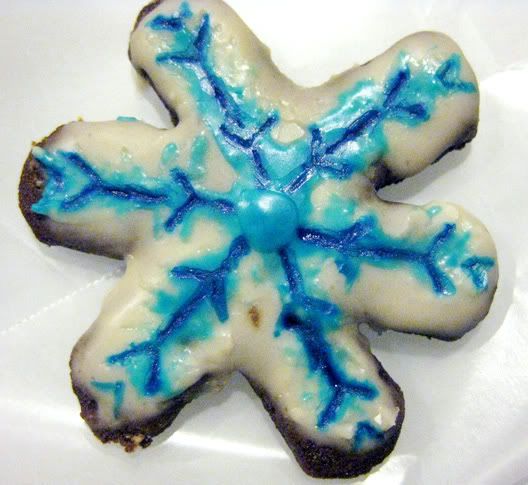
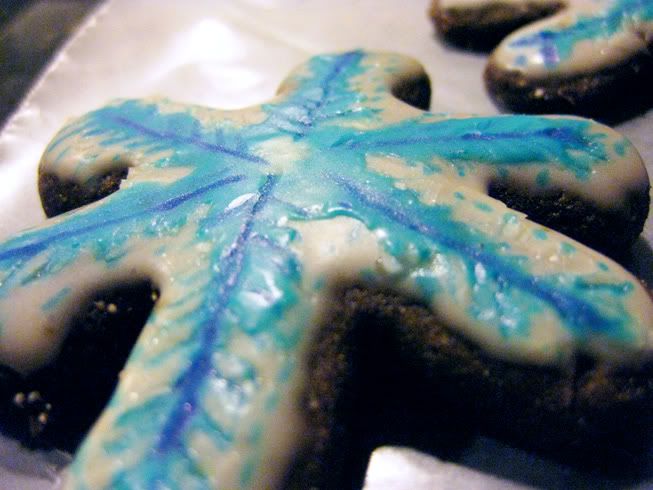
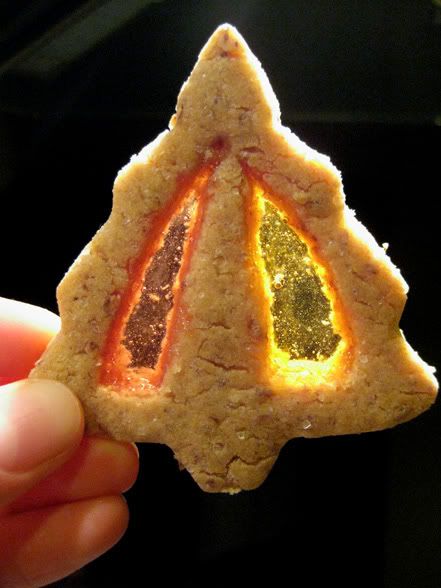
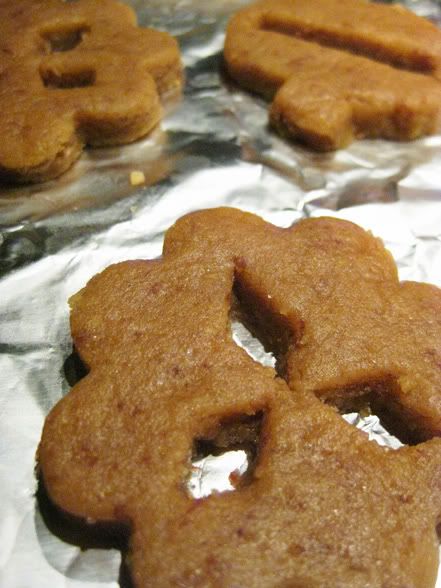
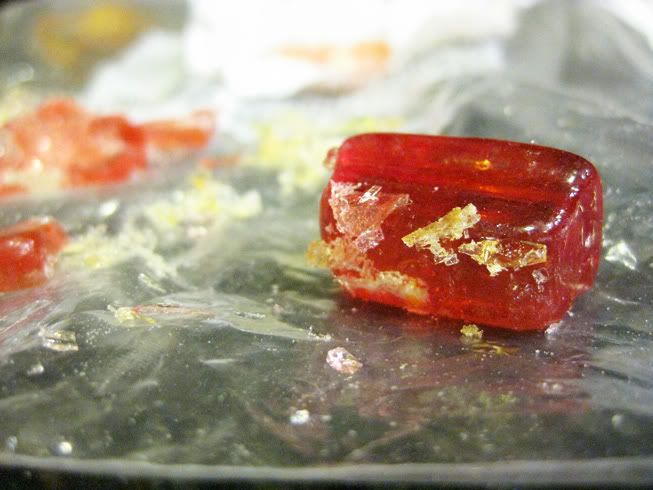
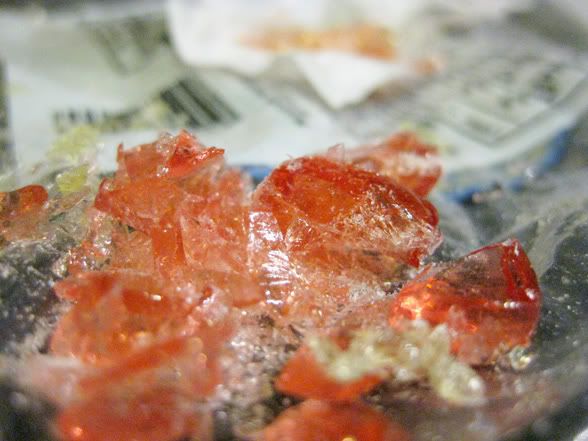
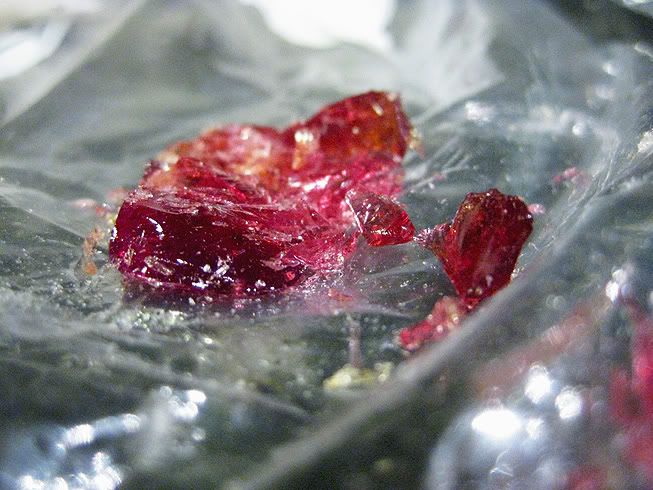
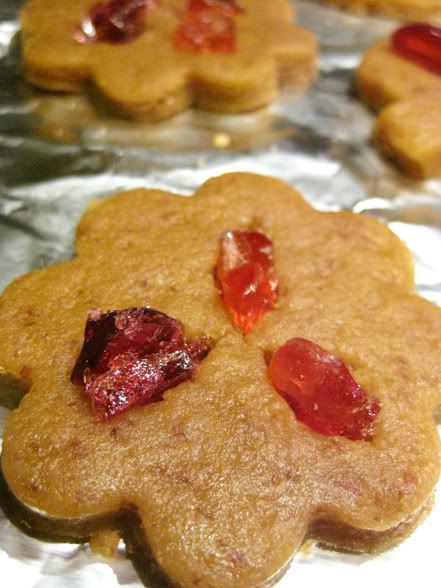
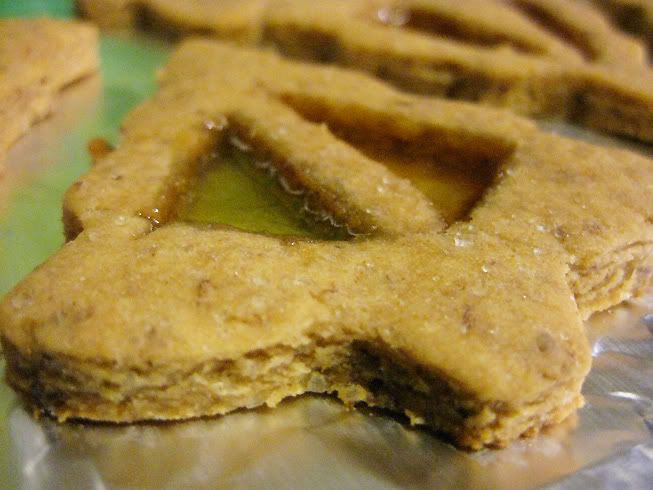
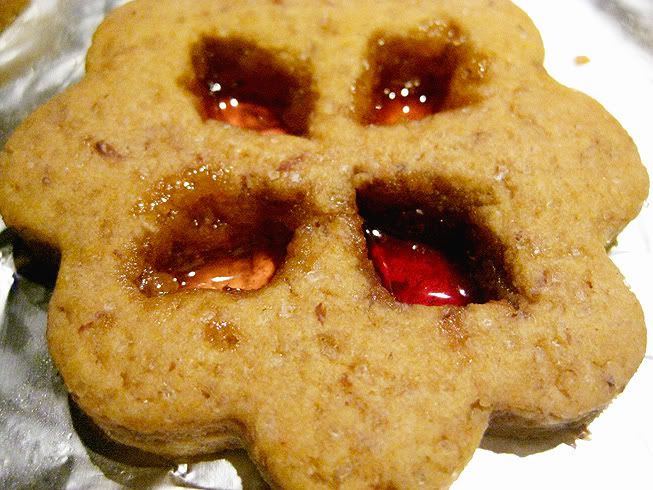
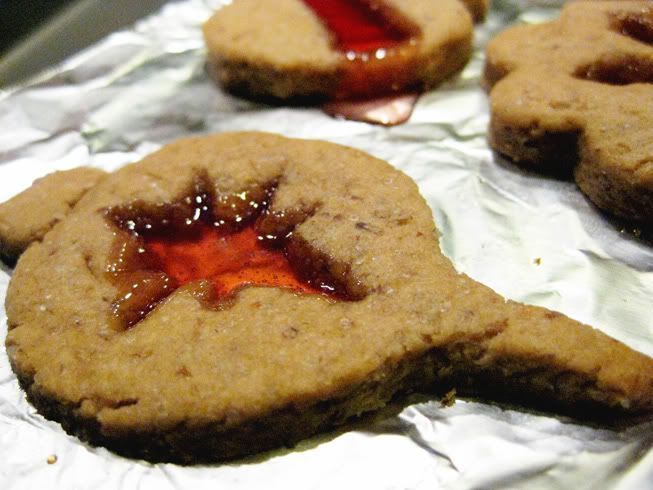
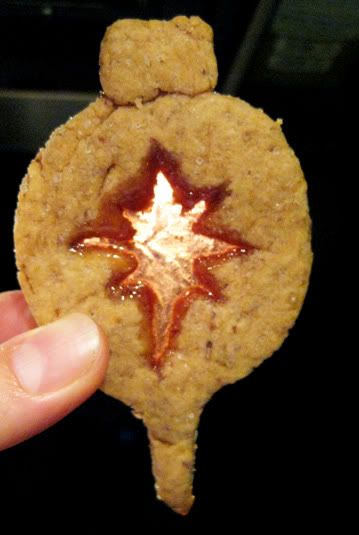
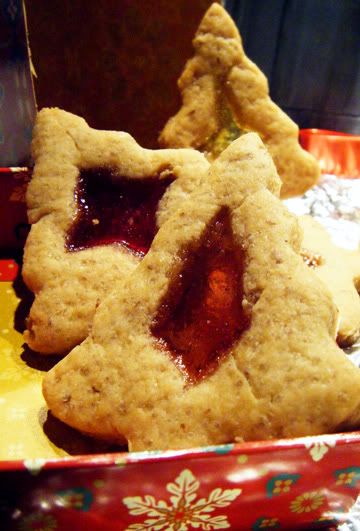
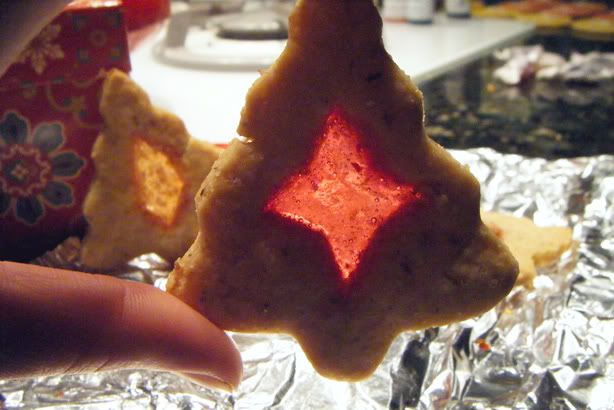
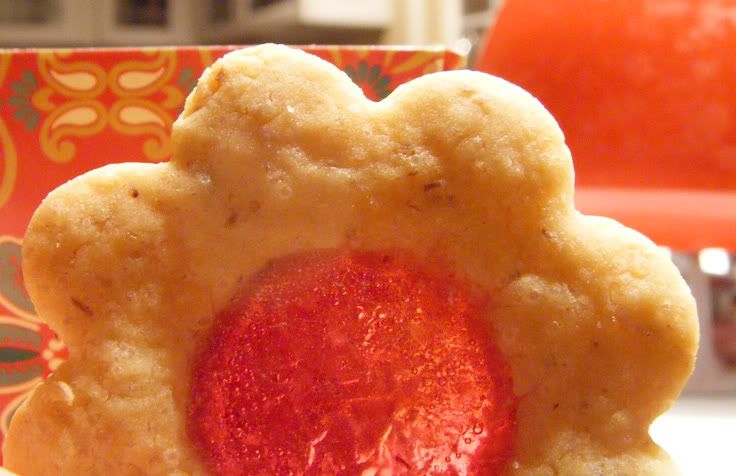
On a more positive note... Here is my second and more successful
attempt at the Stained Glass Window Cookies. I did the things I
noted for improvement and came out with a much better product!


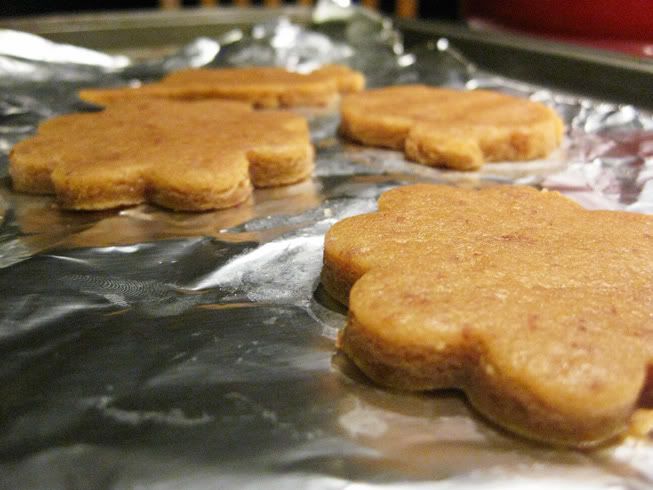
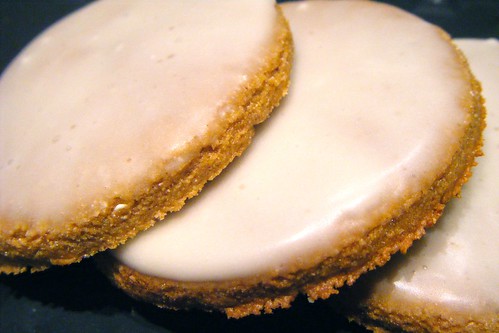
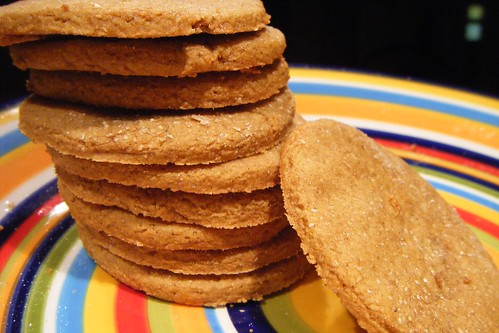
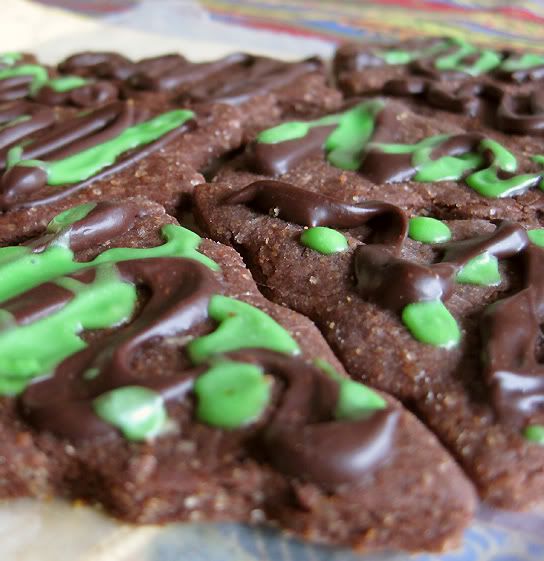
The last batch of cookies I made were some fancy Thin Mint
Christmas trees. Very very tasty and cute to boot!


For Christmas I got Monkey-man a cast-iron Panini Press that
he has been coveting. To break it in, we are doing a Panini
series! So stay in touch for some lip-smackin grilled sandwichies!

Monday, December 27, 2010

Cookie Commotion: Folk Style Painted Cookies

Finally I got the hang of the painted effect that I was
trying to do on my gingerflake cookies.

It is done by dipping the cookie in glaze and then using
a toothpick to spread colored glaze into pretty designs.


Separate a little bit of glaze to make the extra colors.
You won't need a lot, only a few drops of glaze for each.
Then add as much color as you need.

I added some orange extract for extra flavor and had some fun!

With each stroke you'll have to dip the toothpick to draw.
Its very easy and super pretty, check it out!

Don't let the glaze harden and dry before doing the color
or it won't work.


Saturday, December 25, 2010

Cookie Commotion & a Merry Christmas

Merry Christmas to everyone out there celebrating!
I haven't been able to get out here posting anything,
we had to take a last minute trip to Palm Springs to visit
with my Uncle who is not doing so well. So, our personal
Christmas is being postponed a couple of days until we
can get home and replenish our energy sources.

Since I'm a little backlogged I'm going to continue showing
off the cookies I've been making for my friends and family.
A lot of these ideas can be used through out the year for
different holidays or just if you feel like being fancy.


So here are my 'Cute as a Button Cookies'.
They are just some basic colored sugar cookies with a
decorating twist. I'm going to do these again in Easter
in a whole range of colors. The pastels are so cute and
they were perfect with just the little tiny bit of frosting.


First you cut out a basic round shape.


Then you use a lid to make a deep impression on the cut
out shape, to make the ridge of the button shape.
Add little holes for the button holes with a toothpick.


After they are baked you add a little bit of frosting
with a pastry bag to make the 'strings'.

You can of course flavor the frosting or the cookie dough
to match the colors. I was thinking of adding strawberry
or raspberry extract to the pink ones and lemon to the yellow.


I'll have more treats for you tomorrow. In the meantime,
have a beautiful holiday.

Wednesday, December 22, 2010

Christmas Cookie Commotion & Yuletide


I was really excited for Monday as Winter Solstice aligned with
a lunar eclipse. However, we've been getting some nice rainfall
here in Los Angeles and I'm certainly the last one to complain about
rain. I know our water reserves needed it more than I needed to see
a lunar eclipse. Alas, our night was cloudy.

Yet, the rain certainly didn't stop me from making Buche De Noel:
A french sweet cake in the shape of a Yulelog. Otherwise known as a
chocolate heart attack! Traditional French versions are filled with
chocolate whipped cream and rolled with a egg-laden sponge cake.

I just used a basic vegan chocolate cake and made a special flavored
chocolate frosting for the filling.

My frosting is about 1 1/2 cup of powdered sugar, 3 tbsp cocoa powder,
3 tbsp earthbalance, a tbsp- 2 tbsp of soymilk and 1/2 tsp of raspberry
extract.


I went pretty overboard with the presentation and everything.
I frosted the middle (filling) and then frosted the log when it was
rolled up. Then I melted semi-sweet chocolate chips with a little
bit of soymilk to make a firm chocolate glaze. Usually it is just
chocolate frosting on the outside, scraped to look like a wooden
log. But I really like the glossy chic-ness of the glaze.
Very neo-traditional!


I melted some more chocolate chips by themselves and drizzled designs
on to wax paper, then froze them to make the twigs on the top.


Then I topped it with toasted almonds, some powdered sugar for snow
and some decorated truffle cookies.


Traditionally, the plate would be adorned with meringue mushrooms,
but I make sugar cookies filled with raspberry jam. I then glazed them
and painted them with coloring and vodka, like my snowflakes from
yesterday.


Here you can see the jam in the little pocket. I just shaped them
into little bowls, plopped in the jelly, then covered it up with
another piece of dough and rolled it gently before baking.


Monkey-man had to work late, so this was his surprise when
he came home. I love Buche de Noel and its much more eco-
friendly than burning a wooden log!

Tuesday, December 21, 2010

Christmas Cookie Commotion: Gingerflakes


I don't know how many times I've mentioned it, but as I've probably
said at least once-- gingerbread is my absolute favorite
cookie
. I love the depth and muskiness of molasses along with the
soft and chewy texture of the cookie itself. I could live off of them,
at least for a bit.

Instead of the typical gingerbread men and piped icing, I did some
glazing that was perfect in my head but came out a little bit weird.
I wanted to try the effect of glazing and spreading drops of color
with a toothpick, but I let it dry to much. So I came out with some
smeared bizarre looking flower-flakes.


So I pulled one of my favorite tricks that I learned from doing fondant
and cake decorating... Coloring and vodka. I mixed some blue coloring
with a tsp of straight vodka and painted on the patterns I had wanted
to do.


I used a clean new paint brush and gently tapped the brush into
the glaze, so it didn't drip and had a darker color.


Personally, I really like the result. But like I said yesterday,
I'm going to get a properly shaped snowflake next time.

Tomorrow I'll share my Yule pictures with you, in the meantime
here is one of the Christmas cards I made to send out this year!

Monday, December 20, 2010

Christmas Cookie Commotion!

I originally saw these done in a non-vegan cook book and wanted to
try the idea out for myself, just to see how they would turn out.
The original is full of butter, eggs, and refined candy-- lifesavers
I think. I'm not so much concerned about the candy as I am about
the artificial food coloring that goes into those or jolly ranchers.

There is a lot of things that I will tweak on my second try,
but I'll tell you about that after. Overall this is a really awesome
idea and pretty fun, albeit time consuming. But if you've already
allotted a good amount of time to decorate cookies, there are no
worries there. The project?

Stained Glass Cookies


I have no doubt that you'll surprise your friends and family by gifting
these, as they are pretty stunning.

You start with a basic sugar cookie recipe, roll out, and cut out your
desired shapes...


From there, you cut out some small shapes from the cookies that will
serve as the windows.


Next you're going to select your hard candies.
I'm using Fox hard candies. They are colored from fruit and vegetable
sources and sweetened with juices. I believe they are from the UK,
judging from their vegetarian symbol on the back of the packet. I
got them from Cost Plus World Market for $2.99.


The original author says to put the candies into a plastic bag and
pound them with a hammer. But I just kept mine in the original wax
paper wrapper and hit them with my marble rolling pin.


Next fit the candies, whole or broken into the cut shapes.
This took the most experimentation because I was putting too
large or too small candies in the holes.


You'll be baking these on foil or parchment paper as to remove
them from the hot pan to cool. Also press down around the edges
of the hole so the candy does not leak down under the cookie while
they are baking.


Once they are baked, let them sit on the pan for one minute. Then
remove the paper/foil with the cookies on it and let that sit for
about 20 minutes, until the candy and cookie are completely cooled.


The things I would change:

I'd definitely not use whole wheat or even the white whole wheat
flour again, as it made for a much darker cookie. If doing a darker
cookie I'll make it a chocolate or gingerbread.

I'll be flavoring it with almond extract instead of vanilla, to keep
the colour of the dough lighter.

Get a better snowflake cookie cutter. Frankly, the snowflakes I made
looked pretty... 'special'. They looked like trippy hippy 60s flowers,
not snowflakes.

I'll go back to my go-to sugar cookie recipe. I used a veganized
version from the original recipe from the book and it was too dry
and the cookies cracked a little.


Stay in touch for my next cookie adventure!
Tonight I'll be doing my traditional Buche De Noel for a perfectly
Bewitching Yule, my true holiday celebration! But don't tell Monkey-
man-- It's a surprise!

In the meantime you can check out my other cookie recipes:

Pumpkin Gingerbread Fluffkins
Classic Gingerbread
Applesauce Oat Cookies
Snickery Doodle Cookies
or some Pumpkin Biscotti with Cranberries

Yule Blessings and enjoy the total Lunar Eclipse tonight!

Thursday, November 18, 2010

Pumpkin Patch Part Six: Pumpkin Gingerbread Fluffkins

I have to confess I am more of a cookie dough person than a
cookie person-- that is with the exception of gingerbread.
During the holidays I can practically live off of gingerbread
I almost did when I was a teenager.

I used to work in retail and during the holidays we would have
to start work at 3:30 in the morning. So I certainly wasn't
hungry enough for breakfast, but I had to eat something for
some energy... So, I'd eat a gingerbread man. Then another one
on my break. By then I was off at noon and I could go home and
eat some real food, but I was so wiped I wasn't really hungry.
Yeah, so I'd eat another gingerbread.

Bad of me, I know.

But combining pumpkin and gingerbread was such a natural idea
to me. Two of my all time favorite things combined into one
delicious morsel. I've seen a lot of pumpkin gingerbread
before, but in loaves-- not cookies. I like the rolled gingerbread
more, but these are still pretty tasty.

The rolled gingerbread comes out with either a little crunch or
snap or kinda chewy. I like the chewy kind. Drop gingerbread
comes out soft and fluffy-- like these! That is why I called them
fluffkins!

Pumpkin Gingerbread Fluffkins (about 2 batches)


1 cup cooked pumpkin, pureéd
1/2 cup turbinado sugar
1/4 cup earth balance
1/4 cup molasses
1 tsp vanilla extract
1 1/4 cups flour
1/4 tsp salt
1 tsp cinnamon
1 tsp ground ginger or 1 tbsp fresh grated
1/4 tsp nutmeg
1/2 tsp baking powder

Cream together the pumpkin, sugar, and earthbalance. Next add
the molasses and vanilla and set aside.

Sift together the flour and other dry ingredients. Add this
slowly to the wet and mix until just combined.

On a greased cookie sheet drop a large tablespoon of dough.
These don't spread that much, so an inch and a half apart is fine.

Bake at 375F for about 12-15 minutes. Allow to cool briefly and
then remove. Enjoy with some rice or soynog! Yum!

Saturday, December 19, 2009

Frost those cookies: Six Days til Christmas

I'm only posting something small tonight because I'm beat.
I've been cooking sweets since about 2 this afternoon.
Its all mainly truffles, but some cookies-
Also the orange gingerbread...

The only thing I can compare this perfect setting glaze to
is those oatmeal mother's cookies with the glazing on top.
I love the smoothness of a glazed cookie, especially when
they are still fresh and soft.

Another reason I like glazes, although I do love full on
decorating my Christmas cookies, is that a glaze doesn't
usually involve any added fat. Whereas, frosting is mainly
'butter' or oil of some kind.

I used up the rest of my gingerbread cookie dough that I
stuck in the freezer and made sure to roll it out thicker.
I no longer own cookie cutters, so I used a small drinking
glass instead.
The glaze is so simple and the gingerbread is so good,
that really I didn't know what to do with myself besides
make a cup of tea!

Ice Pond Glaze

1 cup vegan powdered sugar or confectioners sugar
3-4 tablespoons soymilk
1/2 tsp almond extract
1/4 tsp cream of tartar

mix all together until sugar is dissolved.
Dip cookies face down into glaze and pull straight up,
allowing excess to drip off. Allow to dry for a least
one hour.

You can add food colouring if you like to make it a little
more festive. Or you can use this for a cake glaze as well
as it firms up perfectly without being crunchy.

So I sit, waiting with my tea and cookies for the monkey man
to get back so we can decorate our wee Christmas tree!

Thursday, December 17, 2009

Gingerbread in my head: 8 Days til Christmas

I'm sorry, but it is simply not Christmas to me without gingerbread.
Doesn't matter if its cookies or actual ginger bread-bread, I need that
smell in the air and the taste in my tummy. Gingerbread is one
of those things that if made right, I feel like I could live off of.

This was my test batch that I made to get back in the groove.
I'm going to do the frosted and decorated ones this weekend and
the days to follow. Hopefully they will get to their intended recipients
uneaten... I can just imagine my friends opening their little boxes
of goodies-
"Hey, Why is this gingerbread man headless?"

Vegan Whole Wheat Gingerbread Cookies

3/4 cup black strap molasses
1/2 cup turbinado sugar
1/3 cup water
3 tablespoons earthbalance
2 2/3 cup whole wheat flour
1 tsp baking soda
1/2 tsp salt
1/2 tsp allspice
2 tsp fresh grated ginger
1/2 tsp cloves
1 tsp cinnamon


Mix the molasses, sugar, water, and earthbalance
together in a large bowl. Blend everything up so your
earthbalance kind of just floats there in your liquids...


Mix in the remaining ingredients. Form the dough into
separate balls, cover and refrigerate at least two hours.


When dough has been chilled enough, remove one chunk
at a time and roll out into 1/4 inch thickness.
Cut out into desired shapes...
Bake at 350F for about 10 minutes.


Food & Drink Blogs Nutrition blogs & blog posts