Showing posts with label recipe. Show all posts

Friday, October 14, 2011

Vegan Margarita Cupcakes: The Real Deal


As part-two of the fiesta cupcakettes that I made for MonkeyMan's
Aunt, I wanted some crazy margarita cupcakes. Obviously citrus,
but I didn't really know where to go from there.

Hopefully I won't get assaulted for this, but why are there no cupcake
recipes other than from the 'cupcakes take over' book. I looked over
the recipe and could just tell it wasn't going to be flavourful enough.
No, I wanted a sharp citrus, a creamy cupcake, and a strong kick of
tequila. Not a lingering aftertaste and some glaze with sparkly sugar
on top. Too harsh? I just wanted something that would knock people's
socks off. If it was just the tiniest bit bland, people are going to
immediately blame it on being a vegan cupcake.

Ole!


Margarita Cupcakes: El Auténtico

Ingredients

Juice and zest from one lemon
Zest from one lime
3/4 cup coconut milk/cream
(if using cream, reduce the oil and increase the cream to 1 cup)
I Like how this adds a little more of a topical taste
1/4 cup oil
3 tbsp tequila
2 tbsp triple sec
1 tsp vanilla
1 cup sugar
1 1/3 cup cake flour
2 tsp corn starch or arrowroot
3/4 tsp baking powder
1/4 tsp baking soda
1/2 tsp salt

1/3 cup earth balance
1 1/2 cup powdered sugar
lemon or lime zest
1 tsp lemon or lime juice
4 tbsp tequila (Or more)
dash of salt
(one drop of each yellow and blue colouring: optional)

(+rock salt and more tequila)

Combine the lemon juice with the coconut, stir and set aside.
Sift together the dry ingredients (including the sugar).

Stir the coconut/lemon once more and add the alcohol, vanilla, and
oil. Gently combine the wet and dry ingredients, just until mixed.

Portion out into cupcake cups, about 80% full.

Bake for 12-15 minutes at 350°F. Remove when a tooth pick inserted
into the middle comes out clean, or you start to see the tiniest bit of
gold on the tops.

Remove from the pan and allow to cool on a rack. Right after placing
the cakes on the cooling rack, brush the tops with more tequila, making
sure to get around the edges too.

While the cupcakettes are baking, prepare the frosting.
First cream together the sugar and earthbalance, then add the zest,
juice, salt and a little bit of the tequila at a time.

The frosting should be smooth and fluffy, but not stiff or wet.
Right before frosting, brush the cakes again with tequila. Pipe the
frosting on in your favorite design, then top with a tiny wedge of lemon
or lime and sprinkle lightly with rock salt.

These went faster than a blink of an eye. Maybe a guacamole or salsa
cupcake should be next? Or is that just too weird? Okay.

How about a spicy mango?

Tuesday, October 11, 2011

Mexican HOT Chocolate Cupcakettes

Monkey Man's Aunt had her big Five-O last week, so I've been planning
on sending some vegan goodies that direction for a while. Since her
party theme was Fiesta, I couldn't resist going loco for flavour.

This is part-one of these fiesta cakes. I call the mini ones cupcakettes
because I think it sounds cuter. And this is my first official blog
featuring cupcakes. I don't really care for them. If I have the option of
pie or something else, cupcakes are the last thing I would order.

SO. If I don't really like cupcakes and I say these are good...
You better bet these are smokin' Good!

For the initial recipe inspiration, I have to give a big 'ol shout-out
to "Yeah That Vegan Shit" and her Mexican Chocolate Cake!

I basically pumped up the spices, HOT factor, made my own frosting to
top 'em, and overall revamped it for richness. Not being able to resist
chipotle, I had to throw some in. I don't care if that bandwagon has
come and gone as far as food fads are concerned, I am forever sold on
the smokey spiciness!

These were rich, moist, and oh so spicy. Not overwhelming, but you
definitely get a warm kick after the first bite.

(Please be warned that I have a very high heat tolerance,
so please taste as you go).

Mexican HOT Chocolate Cupcakettes


Ingredients (yields 36-40 cupcakettes)

1 1/2 cups cake flour
1 cup sucanat
1/2 cup cocoa powder
1 tsp baking soda
1 tsp cinnamon
1 tsp cayenne pepper
1 tbsp mild chili powder
1 tsp vanilla extract
1 tbsp lemon juice
1 chipotle in adobo sauce, diced
1/4 cup vegetable oil
1 cup almond milk

Add the lemon juice to the almond milk and stir, set aside. Sift together
all the dry ingredients, make a well in the middle of the bowl to add the
wet ingredients.

Add the vanilla, oil, and chipotle and about 1-2 tbsp of adobo sauce to
the almond milk. Pour into the dry ingredients and mix until just
combined.

Pour into mini or regular cupcake cups and bake for 12 minutes at
350°F, or until a knife inserted into the center comes out clean.

It depends on what size you’re baking. Take a peek through the
window of your oven first, if they look like they are still rising—
DO NOT open your oven door! This could cause your cakes to fall!

Once baked through, remove from tray and allow to cool on a baking
rack before frosting.

Mex Hot Chocolate Frosting

1 1/2 cups powdered sugar
3 tbsp cocoa powder
1/4 cup earthbalance
2-3 tbsp almond milk
1 tsp vanilla extract
1 tsp cayenne
1/2 tsp cinnamon

Whip together the powdered sugar and the earthbalance, then add the
vanilla, cocoa, and spices. Add the nondairy milk a little at a time to
get the right consistency. It should be soft and smooth enough to pipe,
but not wet or runny. If it is too wet, just add a little extra sugar and
cocoa to absorb the moisture.

Spoon into a small star and pipe on your classic swirls, or whatever
design you like best. I topped them off with a chocolate cigarette and
a dusting of cinnamon.

Check back soon for some fan-frickin-tastic Margarita Cupcakettes!

Tuesday, September 6, 2011

Vegan, Soy, Gluten-Free Peach UpsideDown Cake

With a lot more gigs picking up and all the summer travel plans,
the side work of writing, blogging and testing has taken the sideline.
However, I’ve been promising this posting for quite a while and
couldn't keep it from you forever!

Last month, I whipped up a summery storm for the Animal Acre’s Hoe
Down
. Cooking and spending time at one of my favorite places?
What could be more fun!

Going with the summer/western theme we had BBQ Tofurky Baked-
Beans, Gardein Chick’n Salad, Tomato and Watermelon Salad,
gluten-free Sweet Potato Corn Bread, and gluten-free Peach
Upside-Down Cake! All my favorite tastes of summer before it
slips away to chilly autumn nights.


I just had to share the recipe for the Peach UpsideDown Cake!!
This cake can be done with pineapple, cherries, mango or any of
your favorite fruits—but I can’t get enough of fresh juicy peaches
when their in season. Served with vegan whipped cream, it is simply divine!

I’ve been doing a lot more gluten-free, so I hope you all enjoy!

Gluten-free Vegan Peach Upside-Down Cake


2 large ripe peaches or about 2 cups, sliced
1/4 cup turbinado sugar
1 1/2 cup All Purpose GF flour
1/4 cup rice flour
1/2 tsp baking soda
2 tsp baking powder
1/2 tsp powdered ginger
1/4 tsp salt
1/4 cup peach pulp or juice
1/4 cup vegetable oil
2 tbsp flaxmeal whisked with 3 tbsp water
1/3 cup turbinado
3/4 cup almond milk
1 tsp lemon juice
1 tbsp vanilla extract

In an 8 or 9 inch pan sprinkle the first quarter cup of sugar, then
place the peach slices over it.
Add the lemon juice to the almond milk and allow to sit and curdle.
Sift together the dry ingredients: flours, soda, powder, ginger, and salt.
Separately mix the juice/pulp, oil, flax sugar and vanilla. Add the
almond ‘buttermilk’ to the liquid mix. Gently fold in the dry mix,
just until blended and pour over the peaches in the cake pan.

Bake at 350F for about 25-30 minutes.
Once removed from the oven, put a plate over the pan and
(being careful to not burn yourself) flip over and let the cake slide out.

Allow to cool, but eat it while its warm with cream (Peaches and
Cream!!) It doesn’t keep that long, so eat it the day of at least!

Tuesday, July 19, 2011

Harry Potter Cauldron Cakes

First off, I know not everyone out there is a Harry Potter fan and
not everyone is an avid fan as some of us. If you’ve never read the
books, watched the films, or taken part in the wizarding world of
J.K. Rowling, I strongly encourage you to.

It may not change your life, but you may be missing out on some really
good entertainment. What’s all the hype about? It may have just gotten
on your nerves and now you’re ignoring it out of principle. Get over it
and go read the books. Really. Honestly. It’s not high classic literature,
but they are really FUN and undeserving of your contempt.

I am not just saying this because of how much I love swords and
sorcery, or because I was one of those teens those wore capes to the
midnight book releases, or was one of those who finished the last book
in less than 48 hours.

I enjoy fan culture like this because of the sense of camaraderie.
Sure you can go to a rocky horror picture show screening or some other
cult flick and experience the same type of tuned-in energy, but the
whimsy of the whole thing becomes addictive. The HP bug doesn’t turn
off when you leave the theater, it stays with you the whole way home
and the next morning and lingers-- leaving you wanting more!

Cult flicks are tons of fun, all the fans cheer when certain characters
come on or when certain credits roll, but Harry Potter is much more.

I think it also has something to do with how loyal the movies were
to the books and how disappointed I was in the new Star Wars and
Lord of the Rings movies. I’ve given up on comic book films (Scott
Pilgrim excluded). I still enjoy the rebooted films like TRON and
Star Trek etc. But they simply don’t exude the same intoxicating energy
that Harry Potter does.

It is engrossing because of the depth, the detail, and the sheer
extent of character development. For many of us it was also a coming
of age ritual. It was something for us to look forward to each year
and to hide away in when reality got a little low. Hogwarts was a little
escape for each of us and sadly it has come to an end. I was a few years
older than the kids in the books when it first came out, but I was still
growing up while I was reading them. So it truly is the end of an age for
some of us.

Now all the films are out, I plan on going back and rereading the series
(when I get some time-- Eventually). I’ve read the first few books more
than once, but not the later ones. So, I’ve gone a little fuzzy on many of
the details. Besides, it is always fun to go back and try and pick up on
all the little hints when you know what the ending is going to be.

To be honest, the end has left me feeling a little low and really old.
I don’t like waiting for Halloween to costume up. How often to I get to
flaunt my Ravenclaw uniform? For now, I’ll have to bid a fond farewell
to Hogwarts and a turning point in my life-- now I’m coming up to my
quarter-life crisis who knows if anything will catch on like Harry Potter
and steal the hearts of so many muggles... at least in our lifetime!

So lets all raise our butterbeer and pumpkin juice to what was a damn
good, magical decade!

Yes, I saw it opening night-- not the midnight showing, but still...
And of course it was epic! (Surprisingly violent, watch out little ‘uns)


In celebration of Book 7 Part Two, I made some Cauldron Cakes
for your enjoyment. To be honest can’t remember if there was a
description in the books of these or not. So I just made what I thought
Cauldron Cakes sounded like. These are not sweet, so don't expect a
cupcake. They are hearty and look like they were cooked over a cauldron!

Harry Potter Cauldron Cakes


3 cups unbleached wheat flour
3 tbsp powdered sugar
2 3/4 cup non-dairy milk + 1 tsp apple cider vinegar
3 tbsp cocoa powder
3 tsp baking soda
3/4 cup vegetable oil
1/4 cup berry jam
1/2 cup chopped walnuts
1/3 cup raisins, cranberries, cherries or chopped dates

Sift together the dry ingredients.
Mix the oil, jam and curdled non-dairy milk, slowly add to the
dry mix and stir briefly to not over-mix the soda. Add the nuts and
which ever dried fruit you like.

Pour into greased and floured cupcake cups or mini bundt tins.
Bake for about 30-40 minutes at 350•F.

Serve while still warm with powdered sugar and jam.


Try em with some Pumpkin Juice!

Here is also a Vegan version of ButterBeer from PETA2 which sounds
pretty good, except I might add some vanilla vodka or spiced rum
to give it a real kick.

Sunday, May 29, 2011

Mother Vegan Seitan Stroganov

If you've followed me for a while, you're probably familiar with
my complicated relationship with mushrooms. You'll also be glad to
hear that I am still working on it. In fact, I actually had a craving
for a dish with mushrooms. Yeah, weird huh? Craving something that
could potentially trigger me to start gagging.

(If you're not so familiar with my mushroom problem-- for some
reason, ever since I was little, they cause me to gag. Not that
I don't like them, they just trigger me to puke. Yes, a complicated
relationship indeed.)

A few months ago I had a dish of middle eastern vegan stroganoff.
It was pretty good, I guess. But it was one of those dishes that you
sat at a restaurant eating while only thinking about how much better
you could make it. (Why the hell am I paying $12 for this!?)

I've also noticed that I have recently been ordering things that
Monkey-man would be more likely to pick off the menu, I suppose it's
my way of eating outside my comfort zone. It hasn't gone wrong so far!

Yet, since I knew he'd enjoy this Russian comfort food, I had to
make it for dinner. I believe that middle eastern versions usually
contain tomato paste, so mine is more Russian. I'd use a different type
of pasta than the little UFO guys we had here-- or even make it again
with some roasted potatoes, even better!

Mother Vegan Seitan Stroganov


2 tbsp earthbalance
1/2 onion, chopped
2 cloves garlic, minced
2 cups white button (or any) mushroom, chopped
1/2 cup cup dry red wine
1 vegetable bouillon cube
2 tbsp flour
1 tbsp mustard
1/4 cup water
1 cup seitan, chopped*
1/3-1/2 cup vegan sour cream
salt and pepper
pinch of tarragon

Melt the earth balance and add the onion and garlic, sauteing
for a few minutes until it become translucent and fragrant.

Add the mushrooms, bouillon cube, and wine. Cook the mushrooms
until the start to look a little soft. Add the flour and mustard
and cook for a few minutes more.

Add the water if it looks like it needs a little liquid.
Toss in the seitan, sour cream and seasonings and heat through.
Serve once the mushrooms are tender and it is thoroughly hot.

Made about enough for 4 servings, maybe more depending on what
you serve it with. I used my homemade cracked pepper seitan.
But use whatever works for you, as long as it has a good flavor.

If it is the unflavored seitan maybe add an extra bit of soysauce
and seasonings.


And if you haven't watched it yet, check out our video entry for
the Daiya cheese contest. And please share it too!

Tuesday, March 8, 2011

Launch Party Prep, Mochi and Memories: Kushi Dango Recipe

Huzzah! Am I ever glad to be back on my broomstick!
It took too long, but I am over my illness and the doctors set me right.

I am most pleased to actually be able to enjoy cooking and food again.
Not sure who is happier though, me or Monkey-man! He was eating the
bland, simple foods right along side me. I couldn’t stomach much and
he was sweet to not make me feel left out of something exciting. But I
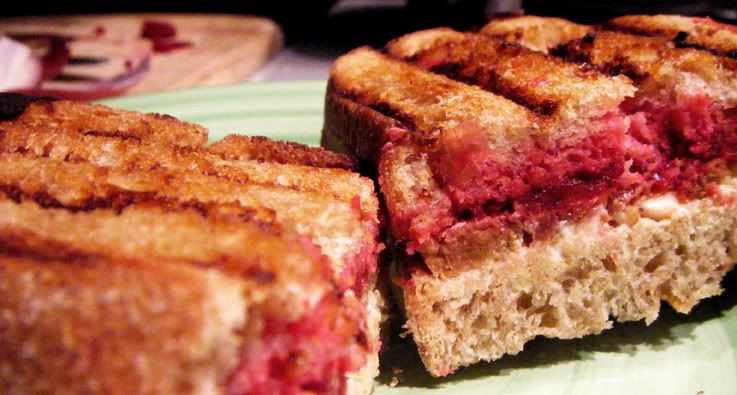
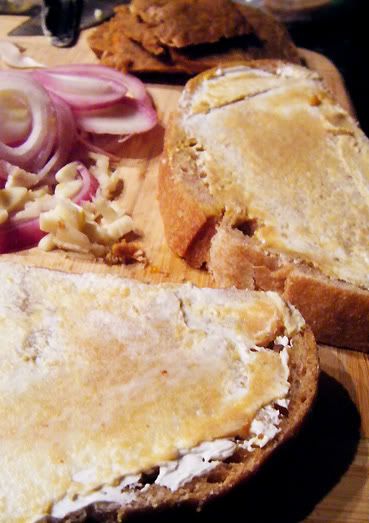
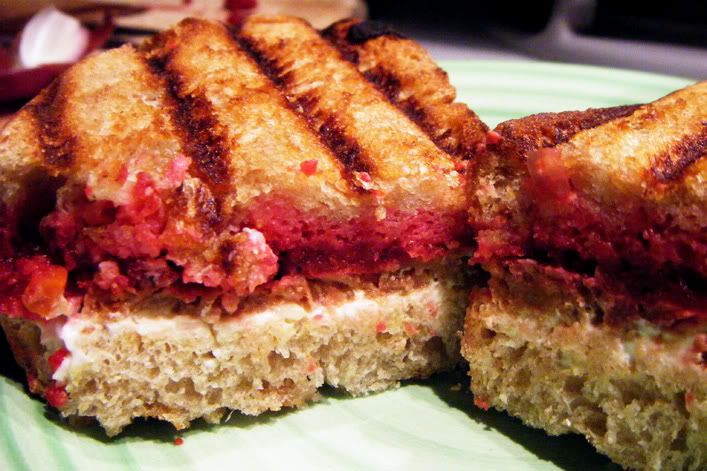
don’t think he could stand eating beans on toast much longer either!

So I am back and getting ready for the Compassion Over Killing
Los Angles Office Launch Party
! It is going to be amazing! There is
going to be tons of great people, food, and a darn good time for all!
You can check out the event on Facebook or get your tickets here!

One of the product donors, Eco-Vegan, is donating some amazing
veggie meat for the party-- and I have the honor of dressing and
cooking it up for the party-goers!

Tomorrow I’ll show you the awesome samples they sent me to test out
the recipes for the party.

Because of the party, I’ve been working on some of the menu items.
One of which will be Mango Mochi! Not a lot of people may be very
familiar with mochi and I am a huge exception to that rule.
Mochi has become a little better known lately, but is pretty unusual.

Mochi is a Japanese sweet made from pounded sweet, sticky rice.
Depending on the occasion, it will be served plain, flavored, colored
with barley or beans, wrapped in pickled leaves (sakura-mochi),
filled with sweet bean paste (an-mochi), baked, served on sticks,
the list goes on and on.

I chose this dish for a number of reasons... first my menu is
Thai-Japanese fusion. A traditional Thai dessert is a steamed,
layered, sweet rice cake that is very similar to a plain Japanese mochi.
Second, I wanted to choose something that would be easy to eat,
pick up, and would be soy and gluten-free for those with allergies.
But most of all, I have very fond memories of mochi and I’d love to
share them at such special occasion...

I took Japanese language courses for many many years growing up
and became entranced with many of the cultural traditions. Wish I was
still fluent, I was as a teenager. Not like riding a bike though.
Watching anime as a kid I loved watching the characters munching on
the sticky treats. Of course the American producers would change the
dialogue and call mochi donuts instead to match US interests.
But I also grew up in a very heavy asian community in So Cal,
so many of the shops nearby offered fresh mochi!

Also, when I was growing up my parents were very into watching
Sumo. I know this may sound very weird to you, but its true. It is
not a bunch of fat guys bumping bellies like many Americans believe.
It rich in cultural traditions (many of which are dying) and extremely
cool to watch. Whenever they got the chance, my parents would take us
to actual tournaments. Instead of hotdogs and peanuts, you’d find red
bean cakes, mochi and Sapporo!

Well, I didn’t drink beer, but I certainly enjoyed the sweets and
maybe some green tea soymilk or red bean ice cream!

Skip to my teen years- Hilo, Hawaii. The communities in Hawaii
emerged from a plantation culture, a conglomeration of Japanese,
Chinese, Filipino, Portuguese, Thai and so on. As such many of the
traditions are seen in the local faire. You see a lot of sushi, char sui,
and yes mochi. Hawaiian mochi is often baked instead of steamed
(oh gods, or worse microwaved) and made with condensed milk or
butter. This yields more of a chewy cake instead of a plush bun.
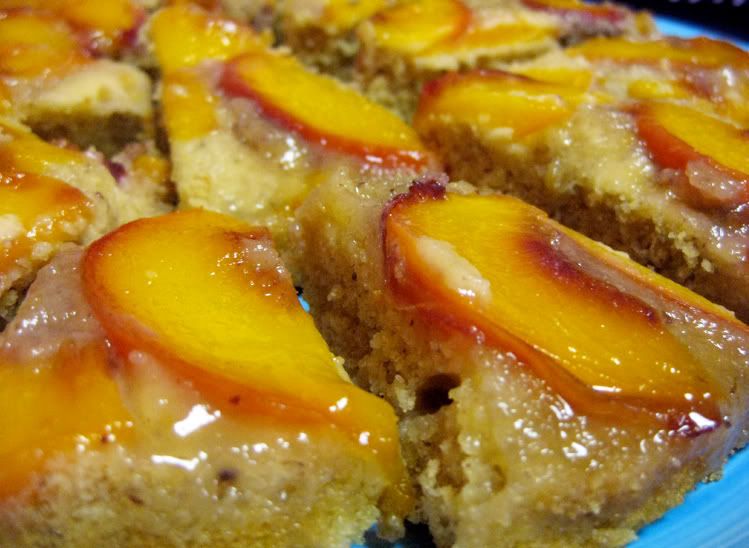
But there are traditionalists, and my favorite was Two Ladies in Hilo
who would make the Strawberry-An Mochi, read bean filled, and even
Taro. But my favorite was the Momo-Mochi-- (Momo= Peach)
Peach and white bean filled. PEACH LOVE!

(To find more vegan Hawaiian Recipes, check out my vegan-hawaii series)

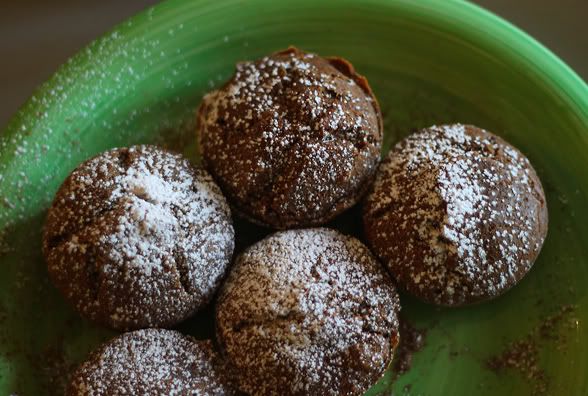
It is from the Hawaiian fusion flavor that I pulled out some wicked
mango mochi. I'll be posting some pictures as I go along and certainly
of the party, but here is something in the meantime. These we would
get at sumo tournaments and anime expos. Plus, something you can
depend on being vegan. FYI, many of the prepackaged versions do have
MSG in the sauce. Find it fresh! If you live in LA, you can get it in
Little Tokyo.

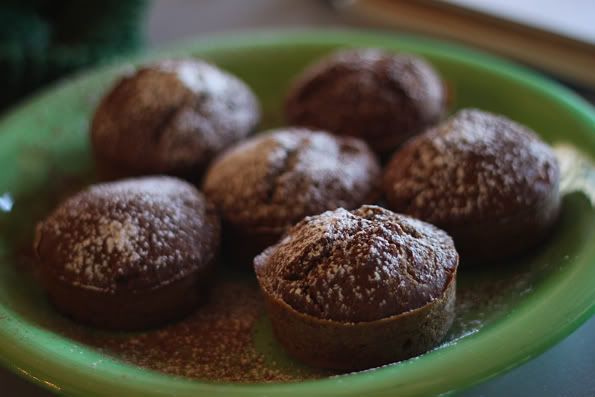
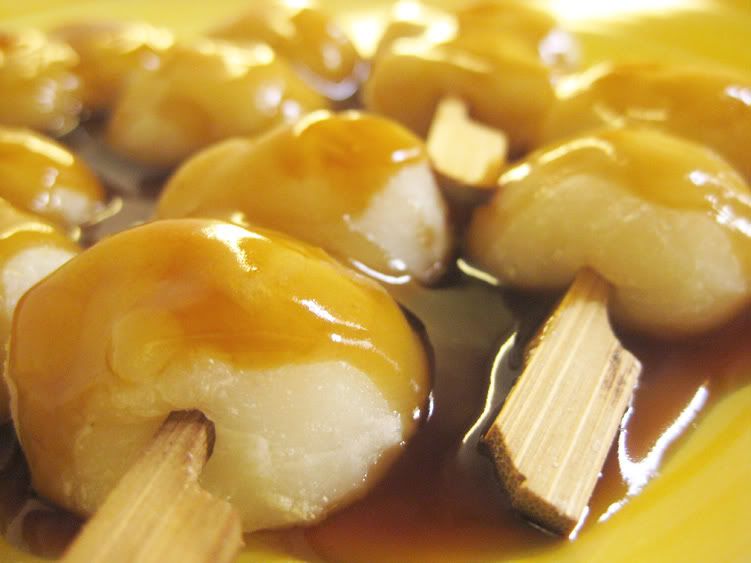
Easy, delicious and not as sweet as your usual mochi cake these are
great for parties or just a snack. Careful, they are addictive!
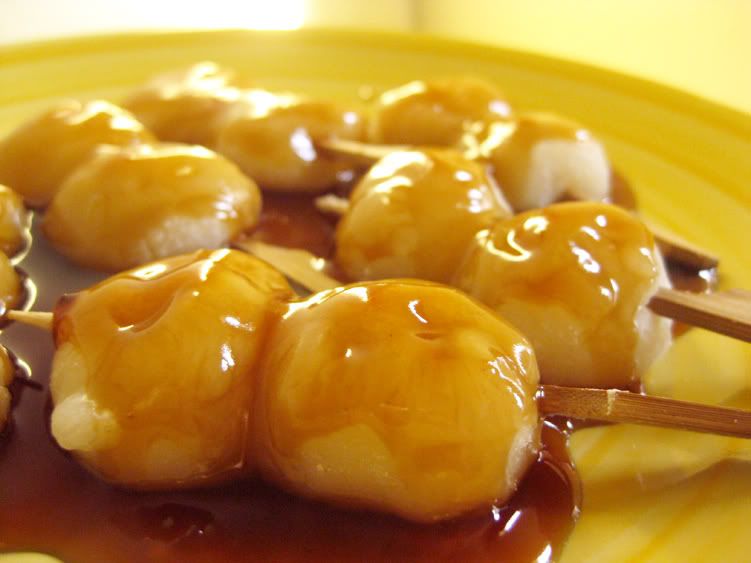
Kushi Dango


Mochi:
1 1/3 cup rice flour
3/4 boiling water

Mitarashi Sauce:
1/3 cup water
1/4 cup sugar
2 tbsp soy sauce
2 tsp potato starch + 1 tbsp water

You can use mochiko (sweet rice flour), they will just be a bit
stickier and chewier. Joshinko, plain rice flour is made from long
grain rice and not as glutinous as the short grain mochiko. Don’t try
to use western style rice flour-- the stuff you’d find in the gluten-free
zone of American and western markets-- it is not the same as Japanese
or other Asian rice flours.

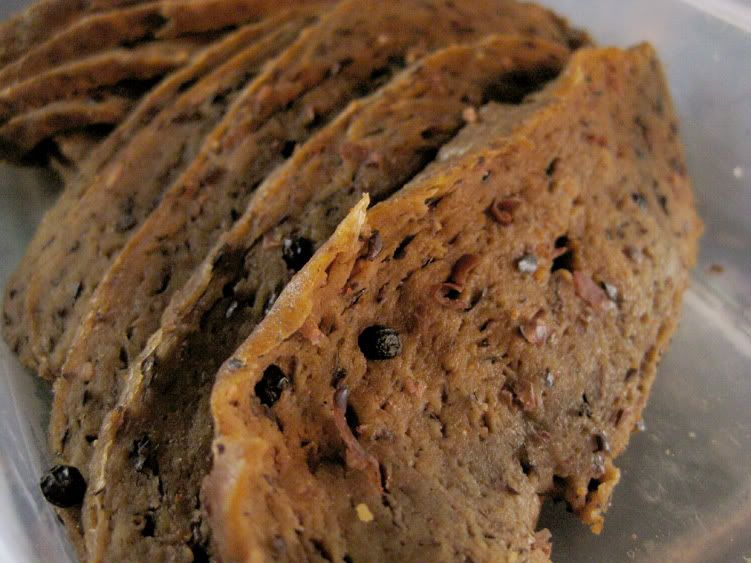
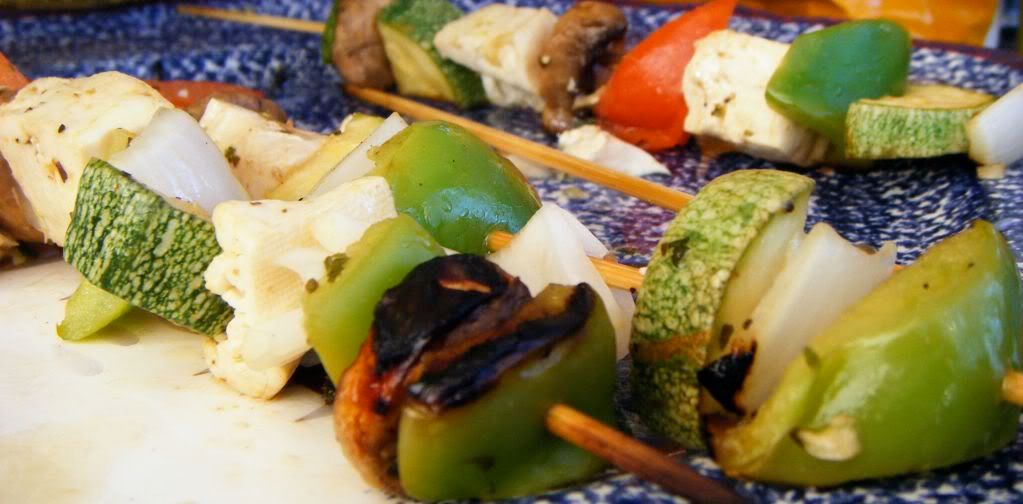
I used party picks here, but traditionally they are grilled on skewers
(3 on each).

Pour the hot water over the rice flour and stir with a wooden spoon or
paddle. Once it has cooled enough to handle, knead in the bowl with a
little extra rice flour. It is more folding over and over to make sure
there are no lumps, not exactly like you’d knead bread dough.

Next pull off little scoops and roll them in between your palms to form
smooth balls. They should be around 3/4 inch in diameter or about the
size of a walnut in it’s shell.

Place into a lightly greased steamer with some room in between. They
will expand and stick together, so give them some space if you can.
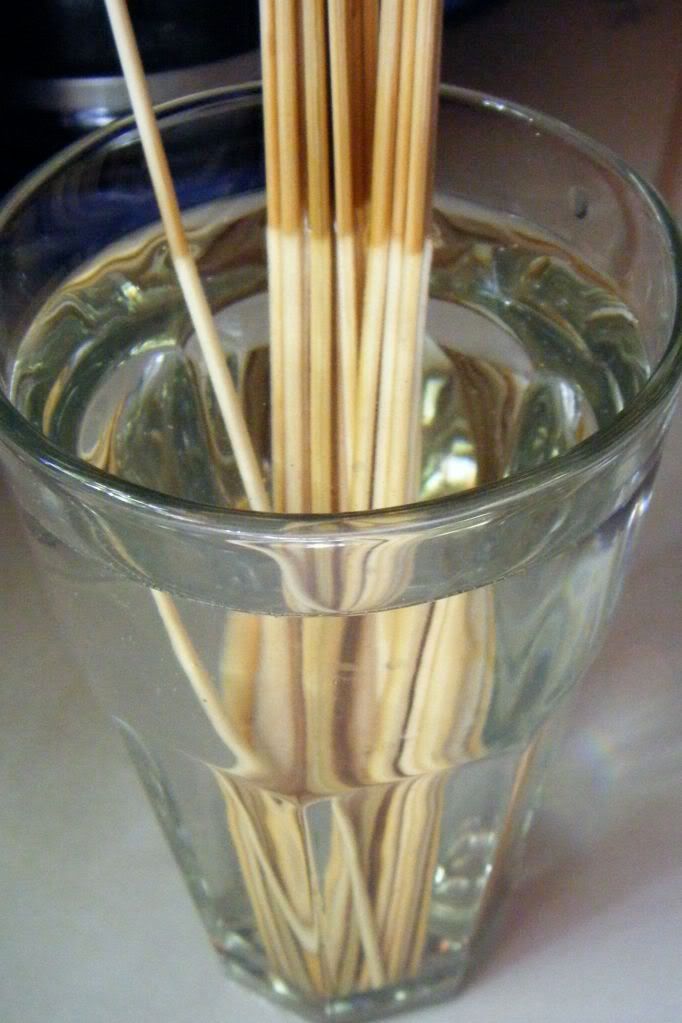
Steam the rice balls on high for 10-15 minutes. Scoop them out and
push on to damp skewers. They will be very sticky.

While your pan is heating, start the sauce by bringing the water, sugar
and soy sauce to a boil. Add the potato starch mixed in water and stir
til thickened. Keep on low.

Place the skewered mochi on a hot, non-stick pan and grill each side
until a golden brown. Brush with the mitarashi sauce and serve
immediately. If you used a joshinko rice flour they will last longer,
if you used mochiko they will get denser the longer you wait.

Thursday, January 27, 2011

Breakfast for Dinner

Growing up we had breakfast for dinner alot. In fact breakfast is
my favorite meal. I like it even more than dessert, believe it or not!

As a kid it was eggs, potatoes, and toast or pancakes.
Later it became tofu, potatoes and a green veg or fruit.
But sometimes toast with marmite! Hee hee As long as it is not heavy in
faux meat or sugary pankcakes, I am a firm believer in breakfast at any hour.

As much as Monkey-man loves his sweets, he goes ape-shit for
anything salty and savory. I think it is a male thing to be honest.
I know I've read something about women being more biologically wired
to like sweet stuff like chocolate. Now this isn't a 100% of the
population or anything, just tendencies. I believe it was a podcast from
Stuff You Should Know or Stuff Mom Never Told You.

Anyway, I was thinking a quick fix of french toast for dinner,
but there was no way I was gonna get Monkey-man happy with that.
And it dawned on me-- savory french toast. Who says this stuff
has to be sweet.

It worried me a little though because I once tried to make savory
waffles and it is one of the most embarrassing foods I have ever made
to date. So disgusting. Remembering that I tread carefully.

Now you don't need eggs to make french toast, just your favorite
unsweetened or original flavored non-dairy milk.

I pair this up with some roasted potatoes and a tofu scramble with
peppers and tomatoes.

Breakfast for Dinner Savory French Toast


Ingredients

4 slices of day old or stale-ish bread
(I prefer a whole wheat because of the density)
1 1/4 cups unsweetened or original flavoured non-dairy milk
1/2 tsp garlic powder
2 tsp soysauce (opt)
1/2 tsp white pepper
1-2 tsp black pepper
2 tablespoons of flour or 1 tablespoon starch
1 tsp italian seasoning
2 tsp very very finely diced green onions (opt)
Salt to taste

Mix all the ingredients except the bread in a wide bowl.
Heat your frying pan and a little bit of olive oil over
medium-high heat.

Dip the bread, coating each side and lay it down on the frying pan.
Cook on each side until a dark golden-brown.

While the toast is grilling mix up a sauce of:

3 parts ketchup
1 part mustard
1 part chili sauce
1 part apple cider

Top with sauce and sauteed veggies if you like!
Serve while still piping hot and make sure your coffee is decaf
at this hour!

Tuesday, January 25, 2011

Beet Bejeweled Risotto

Since we had recently gone a little over the top with bread, we hit up
some standard burritos and tacos, and then I had to move on
to a different starch for my meals.

I’ve recently developed a love affair with risotto. There are so many
myths surrounding risotto, telling people it is too hard to make
unless you’ve got Gordon Ramsey screaming over your shoulder,
telling you what to do. I’m here to tell you that risotto is super easy.
If you can pour broth into a pan and stir rice around for a half
hour, you can make risotto.

Of course I like twisting the flavours around. You’ll usually see
some tomato and basil risottos-- anything you might find replicated
from a pasta recipe. Most of all I wanted to change the colour of
the actual dish, so what better than beets? The beets are steamed,
peeled, and chopped before hand so that they are ready to go when
you’re making the risotto.

Its perfect because I wanted to start up some themed dishes to get
you all ready and in the mood for St. Valentine’s Day.

Yes, I know a lot of people really hate St. Valentine’s Day.
Especially, if you’re single or sometimes with a really annoying person.
Well if St.Valentine’s Day is about love, what about loving yourself
a little? Love yourself with a special meal, some dark chocolate,
a glass of wine, and your favorite movie.

Or throw a little dinner party and then you won’t be alone. Maybe
invite all your single friends so no one feels alone out there in
the world of candle light couple events... I honest have never seen
St. Valentine’s as something corporate or designed to make you feel
bad for not having a significant other. I always used it as a day to
remember all the people I love. I’d make cards, cookies, or candy for
all my friends and family. Later on in life, I got little things here
and there from boys and that was nice too. But I wasn’t expecting it,
so it was even better.

Getting back to cooking.... If you are trying to multi-task while
making risotto, good luck. I mean forget it. You’ll probably end up
with some hard, sticky rice. You can hardy leave the pan alone for a
minute without it drying out.

So make sure everything else is set and ready to go. Feed the cats,
take out the dog, avoid interruptions. And enjoy~

Bejeweled Risotto


3 medium beets, cooked, peeled and chopped
1/2 large onion, minced
4 cloves garlic, minced
3 tbsp earth balance or olive oil
1 cup vodka
6-8 cups of vegetable broth
or water with a few bouillon cubes dissolved
2 cups arborio rice
1/4 cup daiya moz cheese
black and white pepper
sea salt
sage, thyme, lemon zest

First heat the oil in a large frying pan or saute pan.
Add the onions and garlic and cooking in the oil for a few minutes
at a medium to low high heat.

Add the rice, coating well with oil. Cook for about two minutes,
stirring. Add the vodka, making sure that it is warm or room temp
to not shock the rice leaving it unable to cook properly.

Once the vodka is almost absorbed and the liquid looks sparse,
add a 1/2 cup of warm or room temp broth. You will continue to do
this. Add broth, stir, cooking it just at a light simmer until the
liquid is not quite gone, add more broth. Don’t let it get too dry.

Once it starts to look puffy and sticky, start testing it to see if
the center is cooked. Once it is near al dente, add the seasonings
and chopped beets. Continue to cook until the beets are hot and the
colour has distributed nicely. Add more broth still as needed.
Finally, add the daiya and stir until completely melted. Serves 4-6

I had mine with some garlic-chili grilled tofu! Yum!

Sunday, January 16, 2011

International Vegan Pizza Day


I new celebration on the rise is coming up the 29th of this month:
International Vegan Pizza Day, which sounds like a blast.
Or at least a perfect excuse to throw a party.

So for all you vegan pizza lovers out there, get busy and
make your plans. Check out what places around you serve
the best vegan pizza and help spread the word.

Or if you're like me and would rather stay in and do it all
yourself... Check out some of my awesome pizza recipes...

The TMNT Cowabunga Pizza
The BBQ Pizza
The Double-Decker Pizza
The Nutty Chipmunk Pizza
The Rastafarian Pizza
Strawberry Fields Pizza
Tostada Pizza (vegan CPK copycat)
El Diablo Pizza
And an apricot pizza


A great way to throw a pizza party is to have all the attendees
all bring a few of their favorite toppings, not a lot though.
Then everyone can help and design their own pizza or slices.

An easy basic crust goes like this...

1 1/2 tsp yeast
1 tsp sea salt
1 tbsp sweetener
2 tbsp oil
1 cup warm water
2 1/2-3 cups flour

Mix all but flour together and let it set for about five minutes.
Slowly add the flour, a half cup at a time. Once it begins to pull
away from the sides, tip onto a floured counter top and knead.
Add more flour as you knead-- if you NEED! ha ha

Once the dough is elastic and appears smooth, place into a bowl
with a tablespoon of oil and flip dough over, so it is greased.
Cover with a towel and let rise until doubled.

At this time you can store it away in the fridge or freezer until
you want to use it later or you can roll it out and use right away!

Other tips for your own vegan pizza party:

* Make sure to have enough and a variety of sauces.
red sauce is great, but what about a white sauce or a pesto?
* Add extra flavors to your dough(s)
what about sun dried tomatoes, black olives, a variety of herbs!
* What are you cooking your pizzas on?
A stone is ideal, but cookie sheets work well. If using a stone
remember to preheat it beforehand for 500 degrees then turn down
to 450 when you put the pizza in.
* Whats for dessert?
A sweet pizza is always fun with jam for sauce, topped with sliced
fruits, chocolate shavings or even drizzled with frosting.
* Have a few pizzas ready to go and planned in case you don't end up
with enough toppings or not enough variety. I usually have two
pizzas ready to go on stand-by just in case!
* Take lots of pictures and have fun!

Let me know what you're doing to spread the word or celebrate for
International Vegan Pizza Day!

Saturday, January 15, 2011

Plethora of Panini: Polish Panini


The original idea that we started out with was to do a 'meat'ball
sub. I wanted to make some seitan balls and it sounded good, but
then I realized we had nothing to make a red sauce.

I still made some seitan, but more in the shape of large patties.
I wanted to see if by adding beets you could get a different color
than the usual broth color of seitan.

I blended about a 1/2 cup of cooked beets, a can of soybeans, some
polish herbs/seasonings (or even just some sausag'y seasonings like
sage or rosemary), some vegetable bouillon, a few tablespoons of oil,
diced raw carrots, a few cloves of garlic (minced), sea salt and
lots of black pepper.

Then I added the wheat gluten, just enough to form a firm ball,
which I split up and steamed for over an hour. We sliced the patties
in to thirds and grilled to finish the cooking process. No, the color
didn't hold. It still ended up the usual light brown color.

To round out the paninis we added some dill pickles and sauteed
shredded cabbage and onion cooked with cumin seeds. But you can use
sauerkraut. I had to add veganaise for good measure and we were
happy campers.

Paninis are pretty easy goes or anything goes, really. It mainly
just knowing what theme you want to go with, pair spices and herbs,
having a good sauce/dressing, cooking the wetter vegetables before-
hand, and getting the hang of your own grilling technique.

I'm done with paninis for now, hankering for a burrito or some tacos.
I always said I could live on bread, but now I'm second guessing that.
Hope you enjoyed the ride!

Friday, January 14, 2011

Plethora of Panini: pairing and pearing


I know when I've hit the tail end of a series. It is usually when I
really can't imagine eating that dish once more in a very long time.
I still have the last few paninis on the docket, but I am growing
very near to not being able to eat another for a while.

In fact I'm starting to crave chimichanga... If I can't grill
sandwiches, I'm gonna find something else to grill.

Since this Panini was so extraordinarily simple and not very
high in vegetable content, I had to pair it with another more
nutritious dish. Monkey-man has been complaining about wanting
soup because he doesn't want to get sick. So instead of arguing
that it isn't soup that will keep him from getting sick it is
a good load of vitamin heavy veggies, sleep and exercise--
I quietly made him some sweet potato stew and he was content.

The stew had sweet potatoes, russet potato, bell pepper, turnips,
onions, garlic, cabbage, and carrots. It was a simple base of broth,
soy milk, whole wheat flour, sage, paprika, bay, oregano, sea salt,
black and white peppers, and peanut butter. I don't usually pair stews
and sandwiches, I usually go with a bisque or blended soup.
But as long as you are sure to moderate with a smaller sandwich,
it is perfect.

The panini was stuffed with vegan rice pepper jack cheese, sliced
apples and pears, a sprinkling of garlic powder, and if you're
adventurous, some jalapenos! The sweetness of the fruit is perfectly
balanced with the spiciness of the 'cheese' and peppers.
I've also heard of pair peaches or apricots with brie, but
I'm not sure what vegan cheese I'd use for that. The vegan brie
we did make from The Uncheese Cookbook had much too much onion
powder in it and I cannot imagine that going with peaches...
I'll keep experimenting and get back to you on that one.

Get your fix with sweet, spicy, and savory all at once.
That's an order!

Wednesday, January 12, 2011

Plethora of Panini: Delhi or Deli?


Although I find middle eastern and Indian food pretty delicious, I
do have to admit one qualm I have with it. Most of what I have tried
is-- overcooked-- for lack of a better word. I'm sure this is because I
haven't gotten to experience traveling in that region and haven't had
the advantage of befriending an outstanding traditional Indian chef.
Even with books, recipes, and restaurants most of what I've tried/seen
has been really heavily cooked dishes of (mainly) grains and legumes.
Not bad, but I always like to have something very raw and fresh with
my meals.

I know there are a lot of salads or cucumber dishes, but too often they
are submerged in dairy.

Another thing that I've found when using Indian recipes is needing to
really know the spices. That is usually the main draw of this region's
dishes-- the spices! So exotic and exciting, but if over done it gets
a heavy dusty taste. That is really the only way I can describe it.

If you don't agree with any of this, please feel free to call me on it.
I'm just describing my own experiences. When making an Indian
spiced Panini, I wanted the flavors you know and love with an added
freshness. This is into way traditional, just a delicious experiment.

When making Paninis I always try to consider what the sauce is going
to be. Sometimes it is a spread, a cheese (vegan please), or dressing.
It should be something that is still tasty when hot or melted, as you
will be grilling it. All that the sauce does is keeps the entire
sandwich from being super dry and crunchy. You want a hot, flavorful,
moist interior, with a crisp, crunchy crust.

You can do more than one. I used veganaise and mustard with the
balsamic vinegar panini for example. Sometimes the vegetables add
enough moisture on their own, but not always.

For this panini I did two. I had a hummus spread on one side and
vegan yogurt on the other. I added a little salt to the yogurt as
the Whole Soy brand, my brand of choice, is a little sweet sometimes.

For the vegetables I separated them and seasoned them differently, to
add variation and to avoid the over spiced taste that I spoke of earlier.

To the onions, garlic, peppers, and chilis I added some red chili
powder, cayenne, and black and white pepper. I sauteed them until the
onion was soft and tender. I just used water instead of oil whenever
they started to look dry. I added no more than 1/4-1 tsp of each spice.

It depends on how much you are making and how strong you want it.
I made enough for two sandwiches: 1/2 onion, 1/2 pepper, 3 cloves
garlic, 1 hot pepper with 1 tsp chili powder, 1/4 tsp cayenne, and
1/2 tsp of everything else.

Remove your veggies from the pan and get ready to cook the eggplant.
In a tablespoon of oil, quickly roast a tsp or so of cumin seeds. Add 1
tsp turmeric, 1/2 tsp coriander, and 1/4 tsp ginger (opt). Cook briefly
and add about half an eggplant cut into 1/4 inch slices. These were
salted and rinsed beforehand to extract the bitterness. Cook each side
in the spices until the edges of the eggplant appear dark and soft.

Assemble the bread with all the ingredients so far... add some fresh
sliced tomatoes and some cilantro and grill! It may seem spicey, but
the coolness of the soygurt and fresh tomatoes balance it all out for
a perfect panini!

Wednesday, January 5, 2011

Plethora of Panini: Beet on the Brat


One of Monkey-man's Christmas presents was a cast-iron panini press
that I seriously had to hunt down. He's been ogling cast-iron pans
for awhile and next to pizza I am pretty sure sandwiches are his
favorite. Finding it was a hassle. I knew Macy's carried them and after
dealing with countless, stupid employees-- I found one at the Macy's
on Lake. Thank goodness my Monkey-man enjoys the more practical
gifts because this has certainly opened us up to a new series as we're
breaking in the ol' cast-iron.

Cast-Iron takes pampering. You should never wash it with soap, leave it
wet or use metal utensils on it. If you cook things on it that require
cleaning after-- something that sticks-- than clean it with very hot
water and a scrubber. Dry immediately afterward and oil to prevent
rusting. It may seem scary, but if you're cooking something like plain
toast, etc. you just brush it off, re-grease it and leave it. This
will age and season your pan.

I've seen people that cook meat just leave their pans with the fat, crap
and everything. Yeah, gross. Many argue that you should NEVER clean
your cast iron, but I do not agree. I say that you should try to never
use soap on it-- or at least don't use a lot and only when you really
need to. I believe in caring for your dishes properly, but I also
believe in not getting sick from bacteria festering on a pan.

Having said that, cast-iron is great because you can cook on the stove
and then stick it straight into the oven or actually use it as a baking
dish for things like corn bread or roasted vegetables. Our has ridges,
so it wouldn't be entirely ideal for that, but it is a possibility.

On to the food!
Panini, or Panino, is basically an Italian Sandwich. More accurately it
is a bread roll. A stuffed Panino is a roll stuffed with sandwich fixings.
This is derivative of the Italian word for bread: Pane. Often they are
served hot or grilled on ciabatta or focaccia. Americans refer to any
grilled sandwich as a panini, as being grilled is the deciding
characteristic. Whereas any sandwich is called a panini in Italy.

If you don't have a stove press you can use an electric one. Some
waffle makers double as panini presses. You can use a heavy pan and
a brick wrapped in foil. Just allow the brick to heat with the pan
before adding your prepped sandwich. Or you can just set a heavy pan
on top of your sandwich and plan on flipping it.

Part One: Beet on the Brat Panini

Ingredients

Beets or beet pulp (See Below)
2 cloves garlic, minced
vegan cream cheese
mustard
Miso
1/2 Red Onion
Vegan deli slices: ideally field roast, sliced seitain, or something
similar to yves roast slices. I'm sure Tofurky would be good too...
But stay away from the bologna style stuff.
Olive Oil or Earth Balance

When I make Borsht I blend the whole pot and push it through a mesh.
I usually end up with about two cups of beet pulp that I use to fill
dumplings, spread on sandwiches or mix into something else.

I had some left over beet-pulp from our postponed Christmas Dinner
that I still needed to use. You can steam beets and blend them with
a little broth, garlic powder, and salt and pepper. Or you can just
steam a beet and slice it very very thin.

Heat your pan and saute the sliced onion until soft and caramelized.

I made two sandwiches here... spreading vegan cream cheese, mustard,
and light miso on one side of the bread and then sprinkled it with
diced, raw garlic.


Oil or grease the other side of the bread.
Arrange the deli slices on the side with the cream cheese.
Spread or arrange the beets on the other side of the sandwich and
top with the cooked onion. Squish the sandwich together and grill
according to the type of pan you are using.

Cut in half and serve!

Wednesday, July 14, 2010

Pleasing with Paninis

I really think that if you're cooking to tempt omnis, sandwiches and
paninis are definitely one of the best things you can make. Honestly
everybody likes sandwiches and you can pack in so much flavor with
veggie patties, spreads and marinades that you snag people with the
familiar.


I marinaded a pack of extra firm tofu in this marinade, but
added a 1/3-1/2 cup of red wine.

For bread, I made a single batch of whole wheat focaccia.
While that was baking I briefly sauteed 2 sliced yellow squash,
1 zucchini, and 1 green bell pepper. I caramalized a sliced onion
in the remaining marinade that was left over from the tofu. (I used
most of the remaining marinade to actually cook the tofu in).

Once the focaccia was cooked I cut it into 3x6 pieces. I used
guacamole and veganaise on one half and hummus on the other.
Usually when I make paninis I add a splash of balsamic vinegar
or a good slather of pesto. But these spreads were flavourful
enough to enhance the flavour of the veggies.

When assembling put the smaller stuff on the spread so it sticks
and doesn't fall out when you're grilling the sandwiches. I also
added some raw tomatoes and some moz daiya when stacking on the
squash, onions, peppers and tofu. When grilling the paninis you
need to either be using a press or lay something heavy on top of
them. I use another pan with a heavy mixing bowl set inside of it.
Monkey man says to pull a Martha Stewart and use bricks covered
with foil.

Grill each side on med-hi heat for 3-5 minutes with a bit of
olive oil or earthbalance.

I served mine with some oven-baked garlicy frenchy fries.
I ended up with about 8 paninis and some left over veggies.

Monday, July 12, 2010

Cool Summer Pasta

When it is hot, it takes a lot to get cooking. Sometimes you
don't even want to eat, but you can get all the veggies you
need by keeping it cool. I certainly needed a break from all
the bread I've been baking, but I still wanted my carbs.

I whipped up some simple summer pasta for a warm day that
really hit the spot. You can even shred some raw squash instead
of pasta. I briefly sautéed some zucchini and yellow squash just
enough to get rid of that raw flavor and add a little bit of
moisture. Other than that, all I had to do was cook some spaghetti.

Throwing in some chopped green beans, asparagus or even some
tofu-feta would be a nice touch too.

By adding some red chili you can get a little bit of a sweat
going, which is perfect for a hot day. Getting your body to
sweat will tell your body to cool down. Plus the dish itself is
chilled, so you get the meal to cool your mind too.

Chilled Summer Pasta


1 package of spaghetti or angel hair
2 tomatoes, chopped
2 zucchinis, chopped
1 yellow squash, chopped
1/2 can artichoke hearts
1 1/2 cups garbanzo beans
3 cloves garlic, minced
a few green olives sliced
3 tbsp olive oil
juice from half a lemon
1 tsp salt
Red Chili Flakes to taste
black pepper

Cook the squash and zucchini over medium heat with a few
tablespoons of water for only a couple of minutes. Toss
together everything and chill for about an hour before
cooking (opt).

Sunday, July 11, 2010

Vegan Cream of Broccoli Soup

Whenever I don't really feel up to cooking or I'm worried abut
time, I make soup. It was one of those 'what needs to be used
in the fridge' days. I didn't have a lot of open kitchen time
and had a ton of broccoli that needed to be used, so cream of
broccoli soup it was.

I like adding potatoes because it adds a heartiness and
thickness that is so yummy. You can either use a variety of
vegetables or keep it simple with some foundation onions and
garlic then add a dash of nutmeg!

Monkey-man likes his soup with all the big vegetable chunks,
but if I'm cooking for guests and such or if I used some funky
or odd shaped veg I'll blend the whole batch. It is also good
if I want to hide a certain vegetable from my picky Mom. Even
blending half is good and gives you the best of both worlds.

I served these with some baked potato cakes. They are super light
fluffy biscuits. I also added a little bit of kale to keep the super green
color. It is important to try and chop everything around the same size
so that it cooks evenly.

Simple Broccoli Vegetable Soup


2 cloves garlic, minced
1 small onion, minced
2 medium potatoes, cubed
2 small crowns broccoli, chopped
1 cup shredded cabbage
2 stalks celery, chopped
2-3 leaves of kale, shredded
1 bouillon cube
1 1/2-2 cups unsweetened soymilk or nondairy milk
2 tbsp braggs
1 tsp dried parsley
1/2 tsp sage
2 tbsp nutritional yeast
salt and pepper to taste
water

Saute the garlic and onion briefly with water, until tender
and fragrant. Add the remaining vegetables (except kale) with
about a cup of water and cover. Continue to cook, stirring
occasionally until potatoes are almost soft. Add the kale and
cook for about 5 more minutes.


Either add to a blender and add soymilk slowly until you get
your own desired thickness or just add the soymilk and
nutritional yeast if you're not blending. Keep on low-med heat
to heat added soymilk, but do not boil.

If blended, add nutritional yeast last. It adds a nice subtle
cheesy taste that rings of old cream of broccoli.

Wednesday, July 7, 2010

Preserving Some Summer

I wrote before on how much I love preserving the tastes of the seasons.
While Monkey-man is into pickling, his assignment while I'm gone is
pickling 1 lb of jalapenos and maui onions for me. Before I had to
whip up the rest of our apricot yield.

When it comes to apricot jams and such, I prefer mine as preserves.
Not only are you using much less sugar, but I love that chunky type
of jam where it is more reminiscent of real fruit. The lemon juice
acts as a natural pectin to help thicken along with the cooking redux.

Absolutely perfect! You can just as easily substitute peaches or
nectarines, but I love me some apricots. You don't need to worry
about peeling the apricots because the skins break down with cooking
and the peel also contains natural pectin that assists in thickening.

Apricot Preserves


4-5 cups of halved, pitted apricots
3/4 cup raw sugar
juice of one lemon
1 cinnamon stick


In a medium-large sauce pan over medium heat, melt sugar.


Add in your apricots, juice and cinnamon and slightly turn up
the heat. Continue to cook just short of a good boil for about
20 minutes or until it visibly looks thickened.

Don't worry, it will thicken a little more after cooling.
Once it looks thick enough, remove from heat and spoon carefully
in to sterilized jars. After that you can either process or just
allow to cool before refrigerating. It will keep for a couple
weeks in your fridge, but it probably won't last that long because
its sooo yummy!


I love mine on some 'buttered' toast for breakfast.
It's also my favorite fruit spread for some nut butter sandwiches
right up there with my famous pumpkin butter!

Sunday, July 4, 2010

Independence Day: Freedom from flesh

The fourth of July has never been on my favorite's list, but if I'm
heading up the party it can be. When we get invited to summer bbqs
and the parties of non-vegan friends, I am usually very tentative
to attend. Not that our friends and family are not good at providing
some vegan options.

I get physically ill at the smell of cooking flesh, so if there is
to be alot of animal grilling I would rather not go at all.
On the other hand...
I love being 'the vegan in the room'. The best way to positively
impact people is to offer excellent, delicious vegan grub.
This Fourth of July I certainly did that.

I started with some marinated veggie/tofu kabobs....
First remember to soak your skewers so they don't catch fire!


Marinate your veg before skewering them.


I used some green bell peppers, onions, zucchini, tofu, tomatoes,
and some mushy-roomie-rooms.


Veggie Kabob marinade

1/2 cup olive oil
2 tbsp red wine vinegar
3 tbsp lemon juice
2 tsp salt
1 tsp black pepper
1 tbsp agave
1/2 tsp oregano
1/2 tsp parsley
1/2 tsp basil
3 cloves chopped garlic cloves
1 tsp mustard

Marinade overnight or at least a couple hours. Brush the skewered
kabobs before grilling. Grill for about 5-10 minutes to perfection!
Plus stick to firm or extra firm tofu. Tempeh would be just as
yummy though.

Here are our cooked Kabobs. Mine atop a slice of pineapple
destined for my veggie burger. I had a boca burger. Not really
loyal to any kind of packaged veggie burger. I prefer to make my
own. You guys know that! But once in a while these things come up.


My evil little homemade bun is dastardly awaiting his burger.

Thursday, June 24, 2010

Strawberry-Beet Jam


I love experimenting with jellies and jams. Especially because it lets me
pack away a little bit of every season for the rest of the year.
I always make this crazy good pumpkin butter around thanksgiving and
a ginger jelly in the summer to have all year round.

Since I've been getting such great strawberries from a local vendor at
my farmers market I wanted to test out a jelly and if it came out well
I'd get a whole flat and do a big batch.

This is a simple recipe without pectin. I need to go and pick up some
more pectin because I don't like my jellies so sweet. This was pretty
darn good though. I've been spreading it on my toast, puttin' it on
my pancakes, even adding a spoon of the syrup to my cocktails...

Strawberry-Beet Jelly


3 cups strawberries, rinsed-hulled-halved
1 steamed beet, peel and sliced into super thin pieces
1 1/2 cup raw sugar
1/4 cup lemon juice
1 inch chunk of raw ginger, grated

Combine all the ingredients in to a heavy saucepan over low heat.
After the sugar is dissolved and starts to cook, add your strawberries.
Turn up the heat and bring to a boil. Cook for about 10 minutes. It
will show signs of thickening. You can drop into a small dish of ice
water and see if it gels or use a candy thermometer (220F).

Transfer to sterile jars, allowing for some headspace. Process if it
is to be shelved or cool and refrigerate if it is to be eaten soon!

Monday, June 21, 2010

Vegan Jello Shots

**NOTE** This post is intended for responsible adults of legal
drinking age. Please be sensible whenever consuming intoxicants.

I know I promised this a long long time ago and its taken me
nearly three months to post. I'm not sure why that is, but please
forgive me!

This takes carefully planning, a clever palate, and experience with
mixology certainly doesn't hurt. Its good to mix a little bit of
the flavors you chose beforehand to test the taste. Plus its
always fun to drink a little while you're experimenting.

I made these for Monkey-man's Bday party and went through about
three different versions. The first was too hard from too much
agar agar. The second version tasted like medicine. And the third?
Well, lets just say we had a good night.

As far as flavors go, I'd stay away from cherry and strawberry
vodkas because they will yield something reminiscent of cough syrup.
Don't use pineapple juice because it will not set because the high
acid content affects the jelling properties of the agar.

You of course can switch out different alcohols or juices.
I can't stomach rum for some reason, but many like it for it's milder
taste. You can also try some schnapps. I plan to try this with some
orange curacao, but haven't had an excuse to do so.

The photo here is from my blue raspberry lemonade batch that was too
firm, but I wanted to show off the cool silicone cups I used.
These are the cupcake cups I got at Cost Plus. They make great
reusable vegan jello shooters!

Vegan Jello Shots Galore


1 1/2 tbsp agar agar flakes or 1 1/2 tsp agar powder
1 cup mango juice
1 cup lime vodka
2 tbsp raw sugar
food coloring (opt)

Bring the juice, sugar, and agar to a boil and simmer over low-medium
heat until the agar is fully dissolved. Add the coloring, then the
alcohol and stir quickly with a whisk.

Pour into desired cups and chill before serving.
I will yield 15+ shots.

Right after I made these we found boxes of vegan jello at a local
indian market. Go figure. We tried using the mango flavoured box
and it came out just as good. You just split the liquid half juice
half alcohol. It definitely sets up quicker.

Lastly remember that these are pretty alcoholic, so don't be
expecting sweet jello-y goodness when you go to shoot one.
Remember you are taking a shot!! Besides that, have fun and always
be responsible!

Food & Drink Blogs Nutrition blogs & blog posts